
Resize, Convert and Compress an Image in One Pass
One photo, three tools, three uploads: the workflow everyone suffers through. Here is how to...
Read guideShrink a JPG, PNG or WEBP to an exact target like 100 KB, or pull the quality slider yourself. Whole batches download as one ZIP, and nothing is uploaded: every image is compressed on your own device.
Every screenshot below is this exact tool, compressing a real 398.6 KB photo to under 100 KB.
Drag one photo or a whole folder onto the box, or click to choose files. It loads instantly and stays on your device. JPG, PNG, WEBP and GIF all work, and large files are fine, they just take a moment longer.
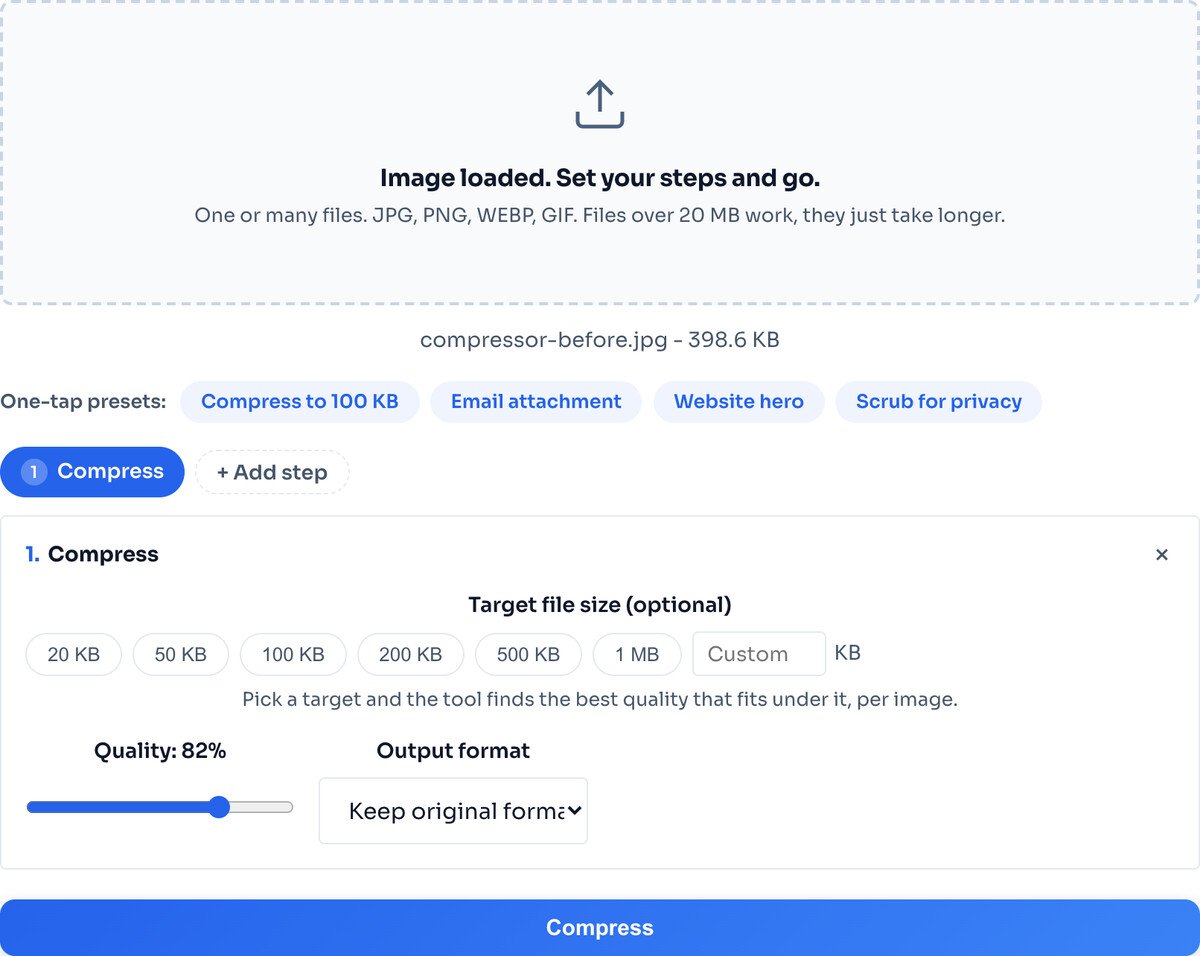
Pick a target like 100 KB and the quality dial switches to auto: the tool searches for the highest quality that still fits under your number. Prefer manual control? Ignore the targets and drag the quality slider instead. You can also switch the output format here, or keep the original.
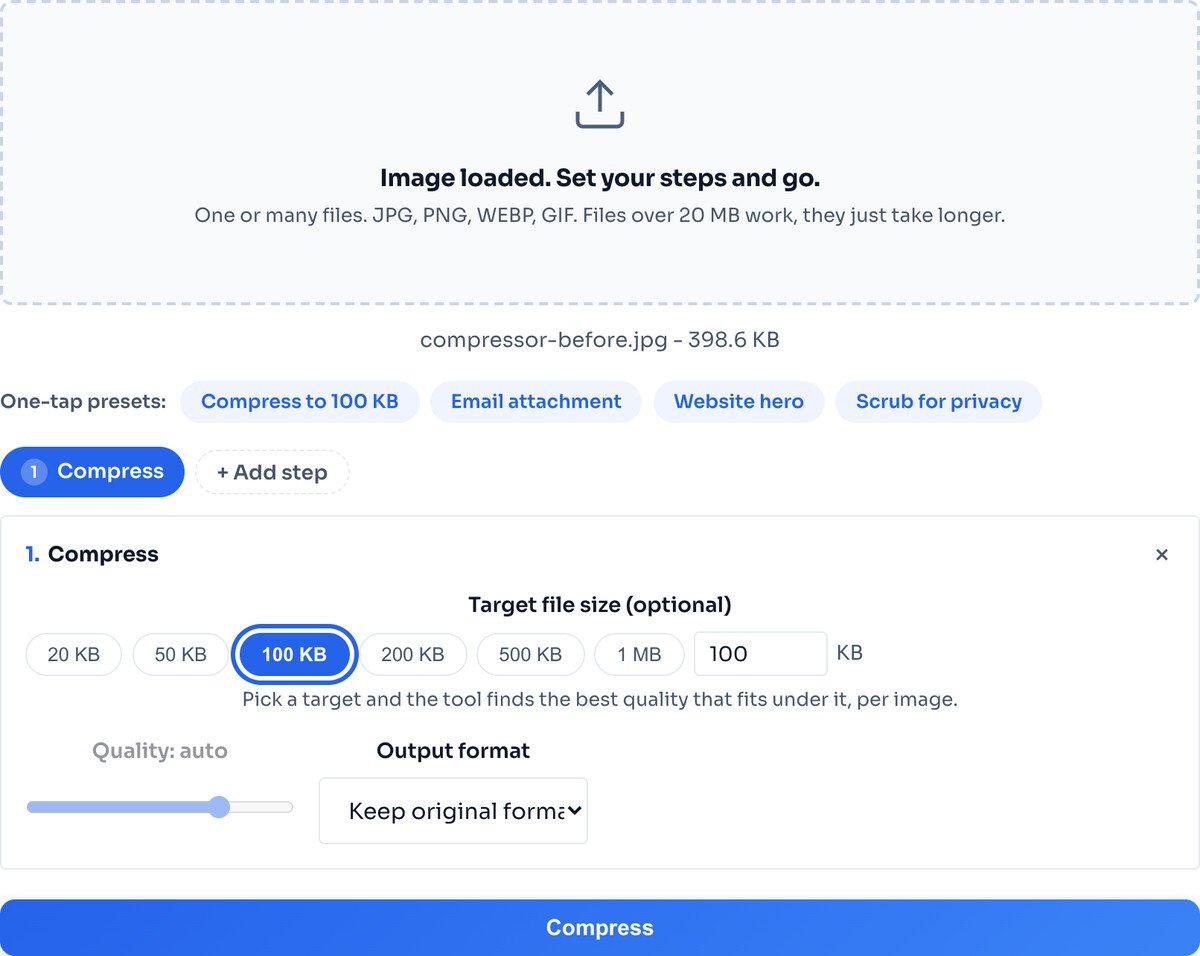
Hit Compress and the result row shows the new size against the original, with the exact quality it landed on. Download the single file, or grab an entire batch as one ZIP. Nothing saves until you click, so you always see the outcome first.
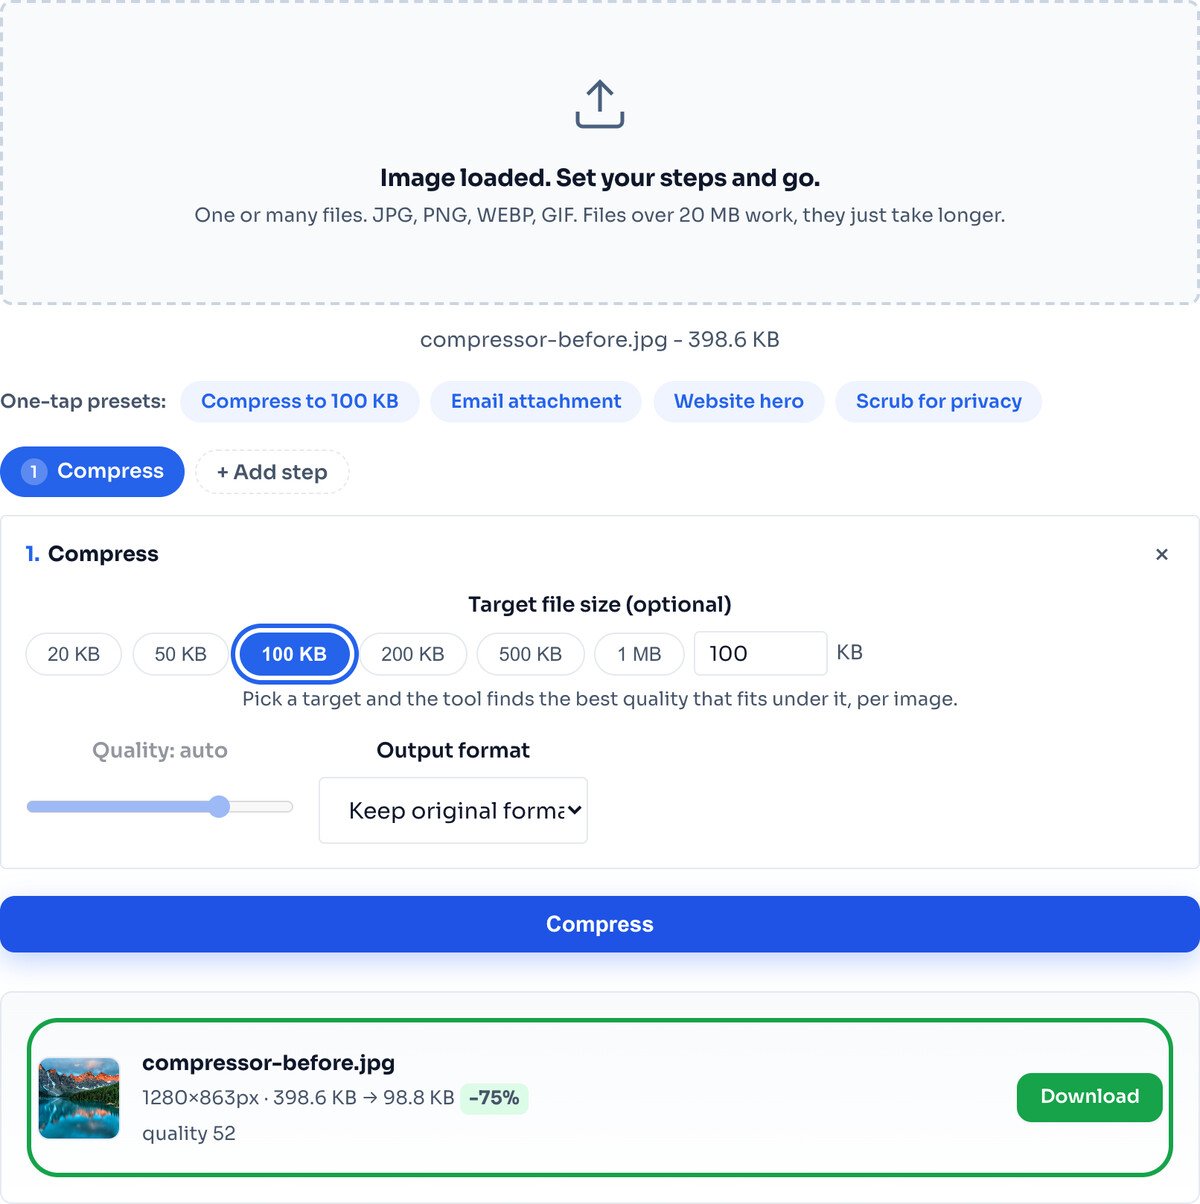
The tool chose quality 52 on its own to fit under 100 KB. On screen at normal size, the compressed copy is indistinguishable from the original. Your own photos will vary, but the result row always shows the real number before you download.
Target file size. The presets (20 KB, 50 KB, 100 KB, 200 KB, 500 KB, 1 MB) and the custom KB box are the fastest way to hit a hard limit, like an upload form that rejects anything over 200 KB. When a target is set, quality goes to auto and the tool finds the best fit under your number, per image.
The quality slider. Leave targets alone and drag this for direct control. Higher keeps more detail and a bigger file; lower does the opposite. For JPG and WEBP, 72 to 80 is the sweet spot, most of the savings with no visible change. It has no effect on PNG, which is lossless.
Output format. Keep the original, or convert while you compress. Turning a photographic PNG into JPG or WEBP here is often what unlocks a big size drop, because PNG cannot compress a photo the way the others can.
Add step. Compression only lowers quality, never dimensions. If a file is still too big, click Add step, put a Resize before the compression, and both run on the same upload in one pass, no re-uploading between tools.
Batches and ZIP. Drop as many images as you like. They process one after another to keep memory stable, each fitted to your settings on its own, and the results list every file with its own download plus a single Download All as ZIP button.
The most common reason people compress is a hard size limit somewhere, and the targets map straight to them:
Type any number into the custom box if none of the presets match. In target mode the tool never overshoots: it lands under your number and reports the exact size and quality it used.
JPG is what compression was built for. Photographs routinely drop 60 to 90 percent with no change you can see, which makes it the right pick for the vast majority of images.
WEBP goes a step further, roughly 25 to 30 percent smaller than JPG at the same visible quality, and every current browser reads it. It is the best choice for images on your own website.
PNG is lossless, so the quality slider barely moves its size. Keep PNG for logos, screenshots and anything that needs transparency. If a PNG is actually a photograph, switch its output to JPG or WEBP and it will finally shrink.
Compression removes information. An already tiny or heavily compressed file has little left to give, and forcing it smaller just degrades it. To enlarge instead, use the Image Upscaler.
PNG has no quality dial. Without switching the output format, a PNG photo barely moves. Convert it to JPG or WEBP in the same step to see a real drop.
Re-encoding rebuilds the image from raw pixels, which strips GPS, camera model and timestamps. Good for privacy, but if you need that data, copy it out first with the EXIF Metadata Viewer.
If the image is also too big in dimensions, resize first. A 4000px photo has four times the pixels of a 2000px one and no screen shows the difference, so resizing gives compression far less to fight.
Past a point the savings shrink while blocky patches appear in skies and smooth areas. 72 to 80 removes most of the weight cleanly; go lower only when a hard size limit forces it.
Each lossy save discards a little more. Keep one high-quality original and export a fresh compressed copy from it whenever you need a new size, rather than compressing the compressed file again.
Not at sensible settings. JPG and WEBP compression work by discarding detail your eye barely registers, and at quality 75 or above the difference is invisible on a screen. Push below 60 and damage starts to show, first as soft edges and blocky patches in skies and other smooth areas. The result row shows you the output before you download anything, so nothing degrades silently.
No. Compression runs on your own device through the browser Canvas API; the file never reaches a server and nothing is stored once you close the tab. You can verify this yourself: open your browser network tab while compressing and watch, or switch off your wifi entirely. The tool keeps working, because there is nothing to send.
Tap one of the target presets or type your own number into the target field. The tool then runs a search across quality levels to find the highest quality that still fits under your number, and if quality alone cannot get there, it scales the pixel dimensions down as a last resort. In a batch, every image is fitted under the target individually, so a small photo is not punished because a big one needed more work.
WEBP, usually 25 to 30 percent smaller than JPG at the same visible quality, and every current browser supports it. Choose JPG instead when the file has to open in older desktop software or picky upload forms. If you want to go smaller still, the Image Converter can write AVIF in Chromium browsers, but WEBP is the safe modern pick.
PNG is a lossless format: it has no quality dial to turn down, so the slider has little effect on it. If your PNG is a photograph, switch the output format to JPG or WEBP in the Compress step and it will routinely drop 80 to 90 percent. Keep PNG only for logos, screenshots and images that need transparency, where its perfect edges are the whole point.
Yes. Drop as many images as you like in one go. They are processed one after another to keep your device memory stable, each one is fitted to your settings individually, and the results list every file with its own download link plus a single Download All as ZIP button at the bottom.
Not by itself: compression lowers quality, not pixel dimensions. If you also want fewer pixels, click Add step and put a Resize step before the compression, and both run in one pass on one upload. The one exception is target-size mode, which scales dimensions down as a last resort when quality alone cannot reach your number, and it tells you when it did.
Yes, as a side effect of how it works. The tool re-encodes your image from raw pixels, and EXIF metadata, including GPS coordinates, camera model and timestamps, does not survive that rebuild. If you want to see what your photo was carrying first, run it through the EXIF Metadata Viewer before compressing.
For email, keep each image under 1 MB and nobody complains. For upload forms, 100 to 200 KB clears almost every limit. For your own website, under 200 KB keeps pages fast. Messaging apps like WhatsApp recompress whatever you send anyway, so 500 KB is plenty. Our image size cheat sheet on the blog has exact numbers for every platform.
You can, but each lossy save discards a little more detail, and repeated rounds of compression add up visibly. The better habit is to keep one high-quality original and export a fresh compressed copy from it whenever you need a different size, instead of re-compressing an already compressed file.
Resize to exact pixels, percent or fit, with social presets.
Open toolCompress a whole folder in one pass and download a ZIP.
Open toolResize a whole folder to one size and ZIP it.
Open toolTrim to the subject before compressing.
Open toolAny format in, clean JPG, PNG or WEBP out.
Open tooliPhone photos to standard JPG, singly or in bulk.
Open toolSee and strip the GPS and camera data in a photo.
Open toolGoing the other way: enlarge smoothly up to 4x.
Open toolOne photo, three tools, three uploads: the workflow everyone suffers through. Here is how to...
Read guideYour photo is 6 MB and the upload limit is 1 MB. Or your website takes seven seconds to load...
Read guideA comprehensive comparison of JPG, PNG, and WEBP image formats. Learn when to use each format...
Read guideMost image SEO advice is a list of thirty tips with no order to it. This is the sequence that...
Read guideLarge images in emails cause slow load times, spam filter triggers, and frustrated recipients...
Read guideWordPress looks like it optimises your images. It generates six sizes and wires up srcset, but...
Read guide


