
Resize, Convert and Compress an Image in One Pass
One photo, three tools, three uploads: the workflow everyone suffers through. Here is how to...
Read guideSet an exact width and height, scale by percent, or tap a social preset. The height can follow automatically so nothing stretches, batches download as one ZIP, and every image is resized on your own device.
Every screenshot below is this exact tool resizing a real 1280px photo down to 800px wide.
Drag one photo or a whole folder onto the box, or click to choose files. It loads instantly and stays on your device. The current dimensions show straight away so you know what you are working from.
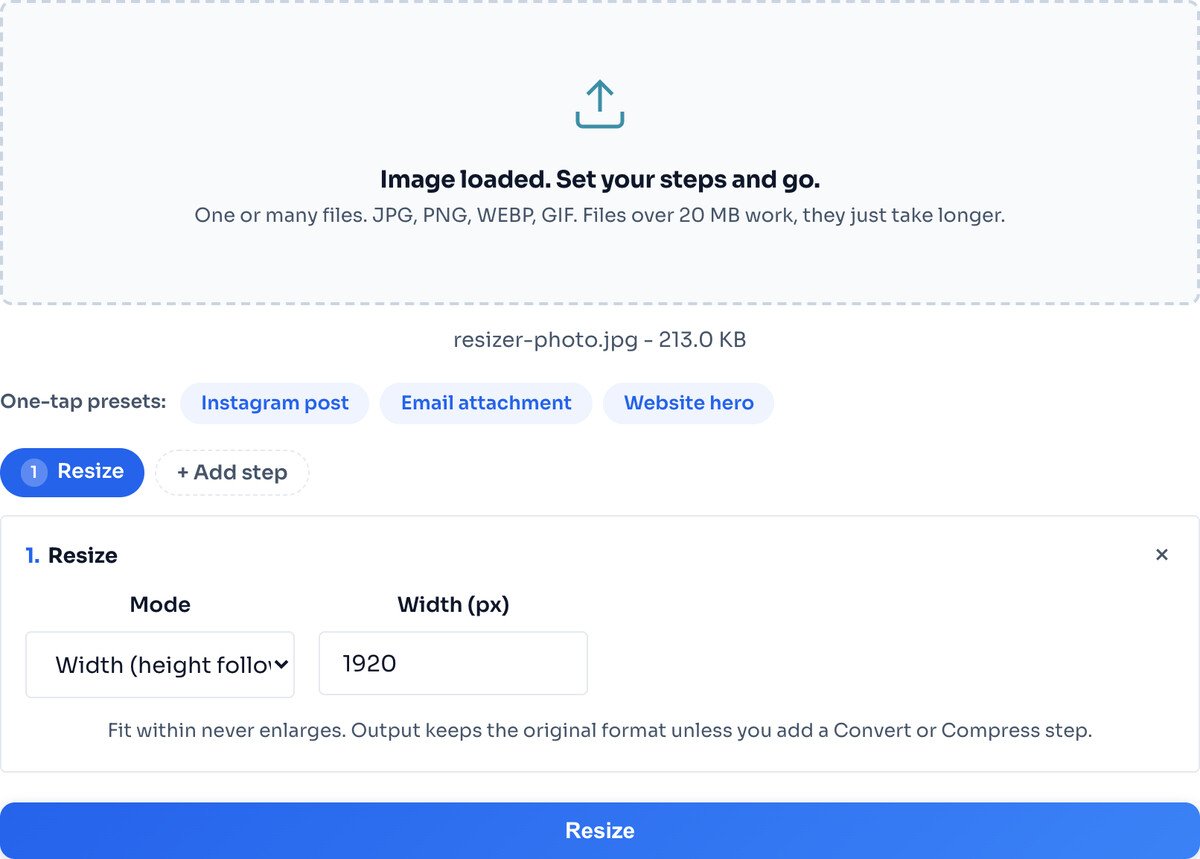
Type the width you want and the height follows automatically, so the photo keeps its shape. Need something specific? Switch to Exact size for both dimensions, Scale by percent for a relative size, or tap a social preset like Instagram to set it all in one click.
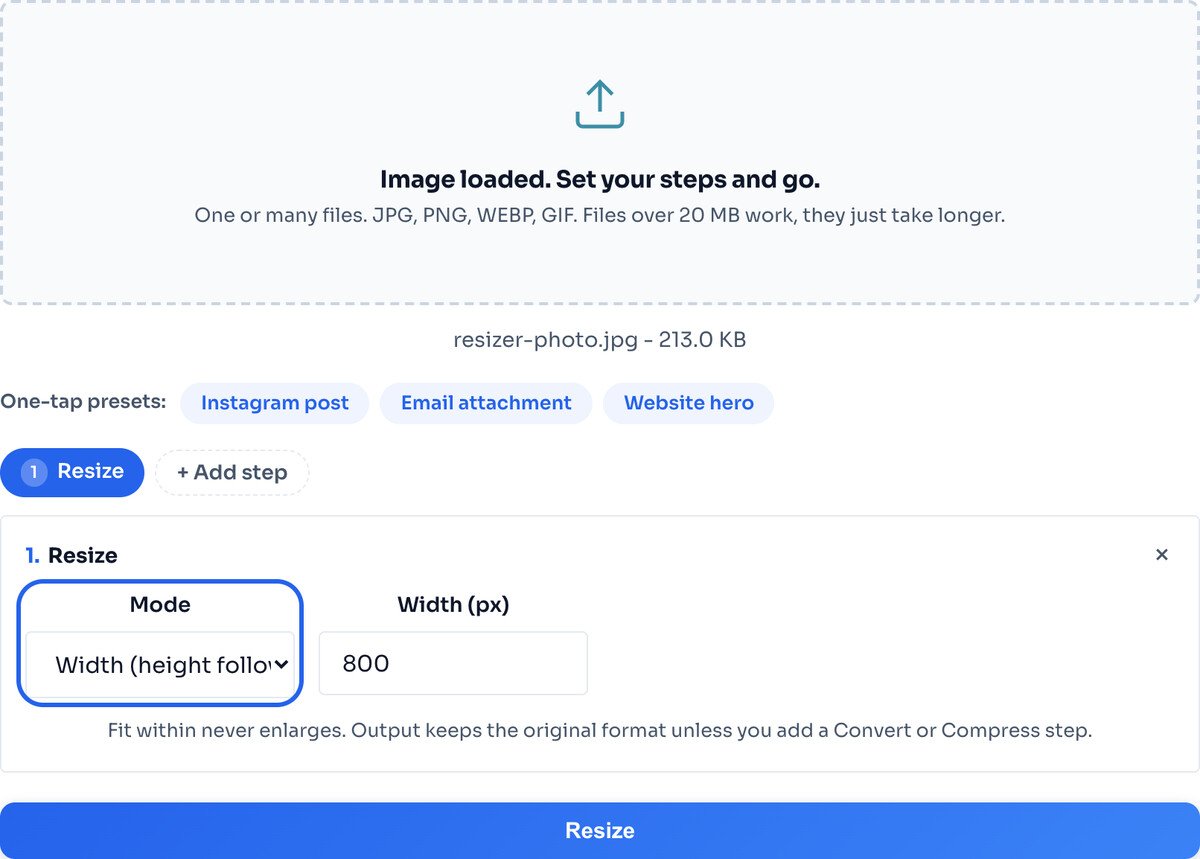
Hit Resize and the result row shows the new dimensions and file size against the original. Download the single file, or grab a whole batch as one ZIP. Nothing saves until you click, so you always see the outcome first.
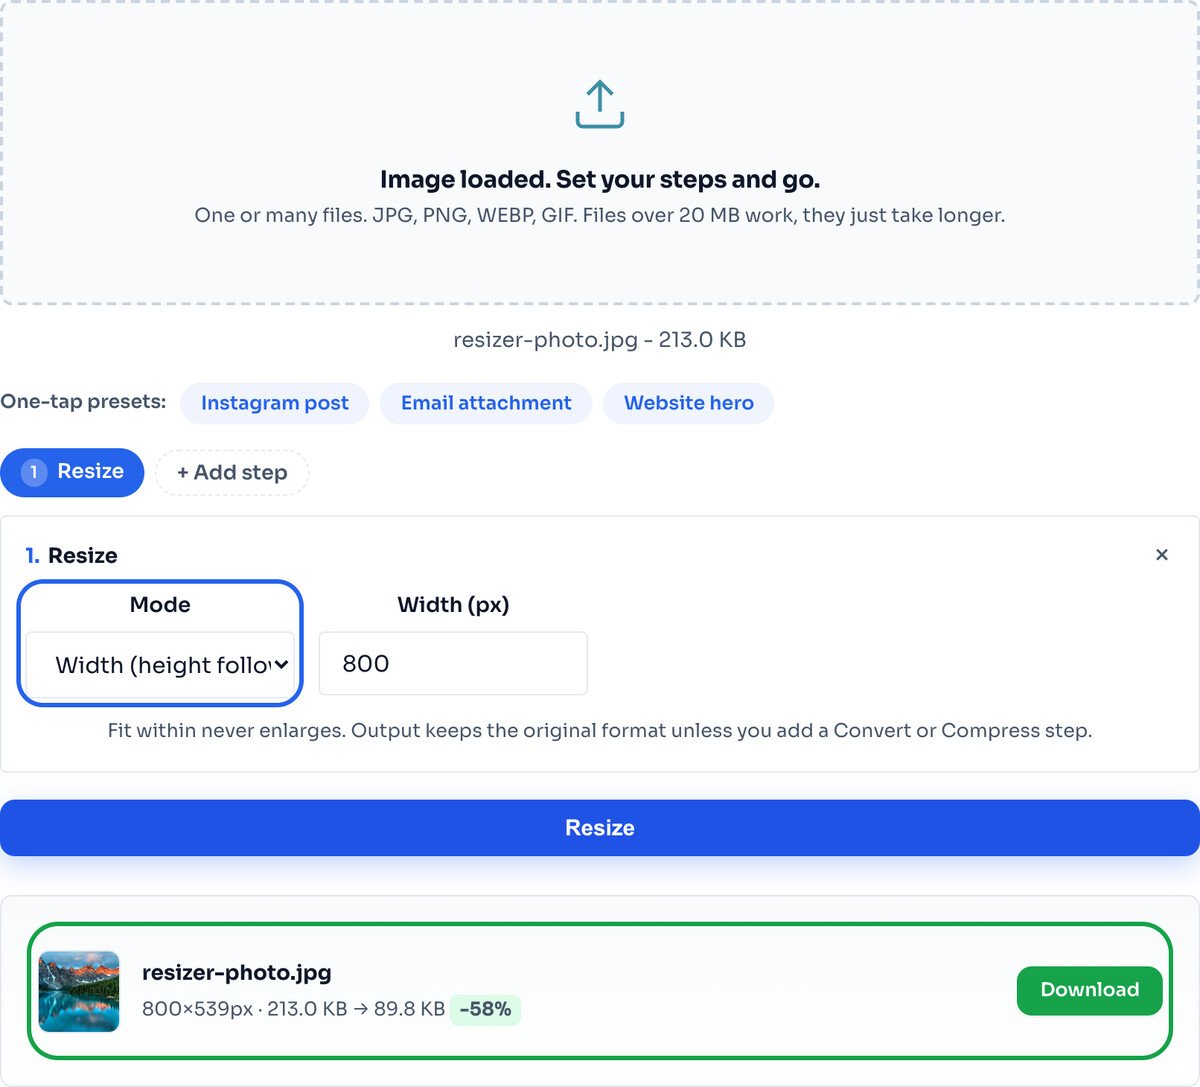
Fewer pixels means a smaller file even before any compression. The height followed the width automatically, so the photo kept its exact proportions. Your own images will vary, but the result row always shows the real numbers first.
Width. The default and the safest. You set the width, the height follows to keep the shape, and nothing can ever stretch. Use it for almost everything.
Exact size. You set both width and height. Powerful when you need precise dimensions, but if the shape does not match the original the image will distort, so pair it with a Crop step for a clean result.
Fit within. You give a box and each image scales to fit inside it without stretching. Ideal for a mixed batch where photos have different shapes but all need to sit under one maximum size.
Scale by percent. You give a percentage, like 50 for half size, and it applies to every image. Handy when the exact pixels do not matter and you just want everything smaller by the same amount.
Every platform wants specific dimensions, and posting the wrong shape gets your image cropped or blurred. The common ones:
Tap the Instagram preset to set it in one click, including a crop to the right shape first. For the full per-platform breakdown with tested numbers, see the size guides linked below.
Making an image bigger means inventing pixels that were never captured, so it softens. Resize down from your largest original. To enlarge with the best possible smoothing, use the Image Upscaler instead.
Exact size mode forces the dimensions you type. If they do not match the original shape, the image stretches. Add a Crop step first, or use Width mode, to keep everything in proportion.
Fewer pixels do shrink the file, but to hit a hard size target like 200 KB, add a Compress step after the resize. Both run in one pass on one upload.
A 400px logo forced to 1600px looks blurry, no matter the tool. Start from the biggest version you have, or accept softening and use the upscaler for the cleanest result.
Forcing a landscape photo into a square squashes faces and objects. Crop to the target shape first, then resize, and it stays natural.
Portrait and landscape photos do not share one exact size. Use Fit within so each scales to its own proportions under a shared maximum.
Shrinking, yes: going smaller discards pixels you do not need at the new size, using high-quality bicubic interpolation, and the result stays sharp. Enlarging is the opposite direction: the tool has to invent pixels that were never captured, so the image softens. Always resize down from the largest original you have, and keep that original safe.
Switch the mode to Exact size and enter 1080 by 1080 for a square post, 1080 by 1350 for a portrait post, or 1080 by 1920 for a story or reel. Or just tap the Instagram preset above the steps and the tool sets itself up, including cropping to the right shape first so nothing looks stretched.
That happens in Exact size mode when the target shape does not match the original shape: forcing a wide photo into a square distorts it. Fix it by adding a Crop step before the resize so the image is cut to the right proportions first, or use Width mode, where the height follows automatically and nothing can stretch.
Switch the mode to Scale by percent and type the percentage you want, like 50 for half size. It applies to every image in a batch, which is handy when your photos have mixed sizes and you just want them all smaller.
Up to 10,000 by 10,000 pixels. Very large outputs use more browser memory, so a huge batch of huge images may be slow on an older phone, but modern devices handle them without trouble.
No. Resizing runs entirely in your browser through the HTML5 Canvas API. Your images never leave your device, and you can prove it: turn off your wifi and the tool keeps working.
Yes. Drop several images in one go and the same settings apply to each, processed one after another to keep memory stable. Download the results individually or as a single ZIP. Fit-within mode is best for mixed batches, since each image scales to fit the box without stretching.
Yes. Click Add step and add a Convert step to switch to JPG, PNG or WEBP, or a Compress step to target an exact file size like 200 KB. Everything runs in one pass on one upload, and the image is only re-encoded once at the end, which preserves more quality than saving between separate tools.
Hit an exact file size like 100 KB after resizing.
Open toolCut to the right shape before an exact resize.
Open toolResize a whole folder to one size and download a ZIP.
Open toolGoing the other way: enlarge smoothly up to 4x.
Open toolCrop a perfect circle avatar for any platform.
Open toolChange format in the same pass as the resize.
Open toolConvert iPhone photos, then resize them.
Open toolStamp a watermark once the size is right.
Open toolOne photo, three tools, three uploads: the workflow everyone suffers through. Here is how to...
Read guideInstagram resizes, crops and recompresses everything you upload, so the dimensions you export...
Read guideYouTube renders the same thumbnail at 168 pixels in the sidebar and half a meter wide on a TV...
Read guideEvery platform wants a slightly different size, and getting it wrong crops your face off or...
Read guideMost image SEO advice is a list of thirty tips with no order to it. This is the sequence that...
Read guideMost stores are not choosing between image quality and page speed. They are serving a 3000px...
Read guide


